Rich beef and red wine stew

Beef abs red wine stew.JPG

Rich beef and red wine stew

This hearty stew is rich and deeply flavourful, and the perfect partner to creamy mashed potato. It’s a great dish to serve if you’re having people over because you don’t need to do anything at all in the final stretch of cooking - the pot just burbles away in a low oven for 2-3 hours. Make the mashed potato ahead of time if you like, and reheat by stirring in more hot milk once the stew is cooked. (Note: the idea for browning the meat in the oven came from Calum Franklin’s terrific book, The Pie Room - he uses the technique to make the filling for his beef, mushroom and blue cheese pie. I love this method as it means I can get on with cooking the vegetables while the meat is browning, saving time, and it delivers a thick and rich sauce).

Serves 4 – 6

1.5kg braising steak (shin, feather blade or similar) cut into 3cm square chunks 

60g plain flour, more if needed

3 tablespoons vegetable oil

1 – 2 tablespoons beef dripping or vegetable oil

120g smoked streaky bacon or pancetta, chopped

1 large onion, finely chopped

2 carrots, peeled and finely chopped

2 celery stalks, finely chopped

6 anchovy fillets (rinsed well if they’re the kind stored in salt), roughly chopped

4 garlic cloves, finely chopped

3 tablespoons tomato paste

½ teaspoon smoked paprika

500ml red wine

600ml beef stock

3 bay leaves


1.     Preheat the oven to 200C and have a large roasting tray ready. (You will have to brown the meat in two batches unless you have two ovens and two large trays). Place the flour in a bowl and generously season with salt. Add the meat a few pieces at a time, and amply drench each piece with flour – really get in and squeeze the meat into the flour so it sticks. 

2.     Transfer the meat to the roasting tray/s. Drizzle over the oil and rub into the meat with your hands. Spread the meat out so the pieces aren’t touching and roast for about 20 minutes, shaking the pan hallway through, until the meat is nicely browned, and the juices have mostly evaporated

3.     Meanwhile, melt 1 tablespoon of the dripping or oil in a large ovenproof casserole, add the bacon, and cook over a medium high heat, stirring now and then, until turning golden at the edges. Remove to a bowl with a slotted spoon.

4.     Add the onion, carrots and celery to the pan and stir into the bacon fat – if there’s not enough to coat the vegetables well, add some more of the dripping or oil. Add a generous pinch of salt, reduce the heat to medium low and cook gently, stirring now and then, until soft, sweet and almost caramelised. Be patient, as this might take a good 15 minutes or more.

5.     Add the anchovy fillets and garlic, stir to combine and cook for four more minutes or so, until the anchovies are melted into the vegetables.

6.     Stir the tomato paste and paprika into the vegetables and cook until you can smell the tomato paste caramelising. If the meat is still roasting at this point, pull the pan off the heat until ready.

7.     Once the meat is browned, remove from the oven and reduce the temperature to 140C. Add the browned meat to the vegetable pan, along with any floury bits and stir well to combine everything. With the pan over a medium high heat, add the wine, and let it bubble up and simmer for a few minutes. Make sure you scrape the bits off the bottom of the pan with a wooden spoon. 

8.     Add enough of the beef stock to just cover the beef, keeping any that’s left over aside to top up later if needed. Tuck the bay leaves under the liquid. Cover and transfer to the oven for 2-3 hours. Have a peek after 1 hour 30 minutes, stir, and add more stock if needed to keep the meat just covered. 

9.     Remove from the oven when the meat is meltingly tender. Serve immediately with creamy mashed potatoes. Or set aside until you’re ready, and reheat on the hob.


Peanut butter and jelly sourdough toast ice cream

Peanut+butter+and+jelly+sourdough+toast+ice+cream.jpg

Creamy, peanut buttery, jammy and toasty all in one mouthful, this is extremely delicious and decadent ice ream. This recipe was inspired by Martha de Lacey, who runs fantastic sourdough and cookery classes on Instagram (and soon to be online, too) called The Muff Kitchen (it’s a subscription services and worth every penny). One of her homework challenges was to incorporate sourdough Into ice cream, and this was what I came up with. I adapted Martha’s crumb recipe and developed a rich peanut butter ice cream with a jam (jelly) ripple.

Just a note on the intensity of the peanut butter flavour - the first two times I made this I used the Skippy brand of smooth peanut butter, and the third time I used a pricier organic no-sugar-added version by Whole Earth. For some reason - maybe the sugar, maybe flavour enhancers - the peanut butter flavour was more intense the first two times. If you’re after more intensity try the cheap and cheerful peanut route or add another tablespoon or so of the no-sugar-added organic stuff. I’d be interested to know how you get on. You will an ice cream maker for this recipe.

Makes about 1 .2 litres

For the ice cream

100g egg yolks (from about 6 medium eggs)

150g caster sugar

130g peanut butter

250ml full fat milk

500ml double cream

For the toast

75 sourdough bread (ideally a bit stale)

30g butter

30g soft light brown sugar

a pinch of cinnamon

A pinch of salt

For the ripple

150g seedless jam of your choice

A squeeze of lemon juice


1.     Whisk the egg yolks, sugar and peanut butter together with electric beaters until lovely and creamy.

2.     Gently heat the cream and milk in a pan until just before boiling , then pull the pan off the heat and set aside for five minutes to cool a little. 

4.     Pour one-third of the cooled milk mixture into the peanut butter mixture and whisk until well combined. Pour this mixture back into the pan with the rest of the milk and whisk together.

5.     Return the pan to a low heat and cook, stirring constantly, until the custard thickens to coat the back of a wooden spoon and the temperature reaches 82C on a confectionary thermometer (this ensures the custard is free of bacteria). Remove from the heat.

6. Fill the sink with enough iced water to come half way up the sides of your custard pan. Place the pan in the water and leave to cool to room temperature. Transfer to a lidded contain and chill for at least a few hours, ideally overnight.

7.     Meanwhile, make the toast. Preheat the oven to 160C and line a baking tray with baking paper. 

9.     Blitz the bread in a food processer to rough crumbs and transfer to a bowl.

10.  Place the butter and sugar in a pan and cook gently until the butter has melted and the sugar dissolved. Don’t let it bubble too much, as we don’t want caramel.

11.  Pour the melted butter mixture over the breadcrumbs, add the cinnamon and salt and stir to combine so the crumbs are coated. Spread out in a single layer on the prepared baking sheet. Bake for 8 minutes, tossing the crumbs halfway through. Leave to cool and crisp up, and store in a sealed jar until ready to use.

12.  When you’re ready to make the ice cream. vigorously stir the jam and lemon juice together until runny.

13.  Pour the custard into your ice cream maker and churn according to the manufacturers instructions - basically until thick, smooth and creamy.

14.   Pour one third of the ice cream into a lidded container or loaf tin, drizzle over one-third of the jam and sprinkle over one third of the crumbs. Repeat twice until you have three layers of ice cream topped with a layer of jam and crumbs. Swirl the top lightly with a knife if you fancy.

15.  Cover and freeze until solid.

Maftoul with roast vegetables, dates and za'atar chicken

IMG_6661.JPG

Maftoul, oversized Palestinian couscous, is absolutely wonderful.  Made from bulgur and whole wheat, and traditionally hand rolled by women, it’s simple to cook and much more interesting to eat than standard couscous. (My son refers to couscous, disparagingly, as fluff.  He’s kind of right.) 

The maftoul, dates and za’atar (an aromatic spice mix) were sent to me by Zaytoun, a social enterprise I’ve reported on before. It was founded 16 years ago to forge a UK market for artisanal Palestinian produce. Farmers in Palestine’s territories, the West Bank and Gaza, have long faced huge obstacles earning a decent living, partly because it’s so difficult for them to reach crucial export markets under Israeli occupation.  Restrictions on movement make travel enormously difficult and land has been seized and encroached on by settlements. Now, Covid has made things so much worse, especially for small farmers.  A second wave of the virus has hit the West Bank, more terrible than the first. And global shortages of medical supplies are exacerbated by the ongoing political turmoil.  

One way to support the farmers is to buy their delicious products - all the ingredients for this dish are available on the Zaytoun website. (Disclaimer: the maftoul, dates and za’atar were gifted to me but this post is not a paid-for advertisement. I believe in Zaytoun’s mission and their products are spectacular).

Serves 2 - 4 (depending on your appetite and what else you serve)

olive oil

2 tablespoons za’atar

4 skin-on, bone-in chicken thighs

Enough chopped veg to fill a roasting tray: peppers, courgettes, aubergines, carrots, red onion

1 onion, chopped

1 garlic clove, chopped

200g maftoul, rinsed

2 tablespoons harissa paste (or tomato paste will do)

350ml chicken or vegetable stock

4 or 5 medjool dates

1 heaped tablespoon chopped preserved lemon

Fresh chopped herbs like parsley or coriander

  1. Preheat the oven to 180C. Place the chicken thighs in a roasting tray, drizzle with oil and sprinkle over the za’atar and some salt. Rub into the chicken all over and roast for 30 minutes or so, skin-side up on the top oven shelf, until completely cooked through.

  2. Meanwhile, roast the vegetables. Place any root vegetables like carrots in a second roasting tray, drizzle with oil and sprinkle with salt. Roast for 10 minutes on the lower shelf before adding the remaining vegetables (adding more oil and salt as necessary). Roast until all the vegetables are tender. If the chicken is cooked first, just set it aside to rest covered loosely in foil.

  3. While the oven is doing its thing, prepare the maftoul. In a medium pan, add a good glug of oil followed by the onion and a pinch of salt. Cook gently until the onion is completely soft. Add the garlic and harissa paste, stir into the onion and cook for a few minutes more until lovely and fragrant.

  4. Add the maftoul and stir to coat, then pour in the stock. Bring to the boil, then reduce the heat to low and cover. Simmer for ten minutes, then remove from the heat and leave to steam for a further 10 minutes, covered.

  5. Tip the maftoul into a large serving bowl or platter and fold in the dates and preserved lemon, and then most of the vegetables. Top with the remaining vegetables, the chicken thighs and herbs, proudly bear to the table to serve.


Baked eggs with greens, spices and yoghurt

baked eggs with greens, spices and yoghurt 2.jpg

I probably eat this at least once a week in various forms, adjusting the greens and spices according to what’s in season, what’s in the fridge and what I fancy. I vaguely think of this as Temple Food, great for a Monday after a weekend of over-indulgent eating. Photograph by Alan Benson, recipe from my book Easy Mediterranean.

Serves 2–4

2 tablespoons olive oil

250 g (9 oz) mixed greens such as kale, spring greens, wild garlic, savoy cabbage, beetroot greens, turnip tops and parsley, thinly sliced

sea salt flakes

freshly ground black pepper

2 garlic cloves, finely chopped

60–125 ml (2–4 fl oz/¼–½ cup) chicken or vegetable stock

a pinch of Aleppo pepper or

chilli flakes

4 eggs

1 avocado, sliced

3 tablespoons Greek-style yoghurt

smoked paprika, for sprinkling


Preheat the oven to 180°C (350°F).


  1. Warm the olive oil in an ovenproof frying pan over medium–high heat and add the mixed greens, handful by handful, stirring and allowing them to wilt as you go. It might seem like you have too many greens but don’t worry, they will cook down. Season with sea salt and black pepper, then stir-fry for a couple of minutes until all the greens have softened slightly.

  2. Add the garlic and a splash of the stock, then continue to stir-fry for a couple more minutes until the leaves are tender. Add as much stock as you need to prevent the greens drying out and sticking to the pan, but you don’t want any liquid left when the greens are cooked.

  3. Remove the pan from the heat and stir in the Aleppo pepper or chilli flakes. Make four indentations in the greens and crack an egg into each one, then arrange the avocado slices around the eggs. Stir the yoghurt well to loosen it, then spoon it in blobs over the greens and sprinkle with paprika.

  4. Bake for about 10 minutes or until the egg whites are just set and the yolks are still runny. Serve immediately, accompanied by some good bread, if you like.

Fish and harissa polpette in tomato sauce

Fish polpette.jpg

Why don’t we think about using fish in ‘meatballs’ more often? Polpette, kofte, fishballs, call them what you will, they’re a terrific way to serve fish. And they’re a great way to lure those who are take-it-or-leave-it about fish to eat more. I used haddock but any firm white fish will work well (and a mackerel version is on my list to try). Serve with a spicy tomato sauce as I did here, or forget the sauce and stuff into flatbread with salad and aioli.


If you don’t have harissa in your kitchen artillery you need to rectify. I’ve always used Belazu Rose Harissa (not an ad, it’s just the best there is!) - it’s a very simple way to elevate simple ingredients into something tasty and interesting. (Stir into minced meat for burgers, stews, pasta sauce, marinate chicken/meat and so on). And unlike curry paste, I don’t feel guilty not making it from scratch. One note though: the amount of harissa paste I used here was based on the Belazu version - other pastes vary in fireyness so use your discretion.

Serves 4

For the sauce

a splash of olive oil

1 white onion, chopped

1 garlic clove, chopped

1 heaped teaspoon (or more if you like it extra spicy) harissa paste

2 tins chopped tomatoes

a pinch of sugar

For the polpette

600g skinless white fish fillets like haddock, hake or cod, roughly chopped

1 tablespoon harissa paste

1 garlic clove, chopped

grated zest 1/2 lemon

a handful chopped flat leaf parsley, plus extra to serve

olive oil for shallow frying

Method

  1. For the sauce, pour a good splash of oil into a medium pan, add the onion and a pinch of salt (I always start cooking onion in cold oil to help stop them colouring) and cook gently, stirring now and then, for 10-15 minutes until soft and sweet. Stir in the garlic and harissa paste and cook gently for a few minutes more, being careful nothing burns.

  2. Add the tomatoes and sugar, stir well, and then leave to simmer while you get on with the polpette.

  3. For the polpette, place all the ingredients except the oil in a food processor and blitz until every is chopped fine and well combined, but stop short of a fine paste. Some texture is good.

  4. Using wet hands, roll the mixture into large walnut-sized balls - you should be able to mke 16.

  5. Pour enough oil into a heavy frying pan to come 5mm or so up the sides, and when hot, add the polpette. Cook over a medium heat, turning them now and again, until they are pale gold. (Don’t turn them too often. They need to develop a bit of a crust so so as not to stick to the pan, and I find a metal spatula works well for this).

  6. When the polpette are done, gently pour the sauce into the frying pan with the polpette, and gently turn them in the sauce to coat.

  7. Serve with your favourite pasta, grains, or rice.

Gooseberry and lime curd

Gooseberry+and+lime+curd+Copyright+Sue+Quinn

A clever writer friend of mine described the flavour of curd as fluorescent velvet and he’s absolutely right: the contrast of the sharp citrus against the buttery smoothness is dazzling and delicious. I normally use lemon juice in gooseberry curd but limes were all I had, and the result is lovely. This is adapted from a gooseberry curd recipe by Hugh Fearnley-Whittingstall that appeared in the Guardian many years ago. Just scale the recipe up or down, according to the size of your gooseberry haul. Serve with meringue or slathered on good toast.

Makes one medium jar

200g gooseberries, stalks removed
45ml lime juice (about two small limes)
50g unsalted butter
180g caster sugar

80g strained beaten egg, around 2 medium eggs

  1. Place the gooseberries in a small pan with the lemon juice. Cook over a medium heat until the lemon juice starts to simmer, then reduce the heat and cover. Cook for a minute or so, shaking the pan, until the fruit breaks down. Remove the lid and continue cooking until the gooseberries have collapsed completely to make a puree.

  2. Pour the puree through a wire sieve into a medium heatproof bowl that will fit on top of a pan without touching the bottom. Add the butter and sugar and stir.

  3. Sit the bowl on top of a pan of gently simmering water and stir until the sugar has dissolved completely and the butter has melted.

  4. Carefully remove the pan from the heat and the bowl from the pan and let it sit for a few minutes to cool a little. Add the butter to the bowl, the bowl to the pan and the pan to a gentle heat.

  5. Stir continuously until the mixture thickens enough to leave ‘ribbons’ or a trail on the surface of the curd that keeps its shape and doesn’t melt away immediately. For me, this took a good 15 minutes, so be patient,

  6. Pour into a clean jar and keep refrigerated - it will be good for a week or so. If you’re making larger quantities, ensure the jars are clean and sterilised, store in the fridge and use within 4 weeks.

Spring salad with avocado, sesame seeds and mint dressing

Image: Alan Benson, from Easy Mediterranean (Murdoch Books)

Image: Alan Benson, from Easy Mediterranean (Murdoch Books)

The chickpeas and avocado add nutritious substance to this otherwise light and bright salad – I especially love the fresh pop of the peas. As ever, tender fresh peas are best here – it’s really not a big deal to pod a few. If you only have frozen peas, that’s fine, just tip them into a strainer and pour boiling water over them – they won’t need any more cooking. I sometimes sprinkle garlicky crumbs on top instead of sesame seeds: just flash fry some bread crumbs in olive oil until golden, adding a little crushed garlic and sea salt flakes towards the end.

Serves 4 as a side 

for the dressing

2 tablespoons lemon juice

½ teaspoon Dijon mustard

½ garlic clove, crushed

4 tablespoons mild olive oil

12 mint leaves, finely chopped

sea salt flakes

freshly ground black pepper

for the salad

40g radishes, finely sliced, ideally on a mandoline

2 handfuls baby spinach leaves

2 handfuls pea shoots

50g freshly podded peas (or frozen, see note above)

a handful flat-leaf parsley leaves

100g cooked or canned chickpeas, drained and rinsed

2 avocado

sesame seeds, lightly toasted for sprinkling

nasturtium or other edible flowers (optional)


  1. First, make the dressing. Pop all the ingredients into a screw top jar and shake until well combined and creamy. Set aside for the flavours to mingle and mellow.

  2. Now, combine all the ingredients for the salad in a large bowl. Have a taste of the dressing and add more salt, pepper or lemon juice if necessary – it needs to be seasoned well. Gently toss the salad with enough of the dressing to coat generously. 

  3. Halve and stone the avocados, cut into slices, and fold almost all into the salad. Scatter the remaining avocado over the top, drizzle with more dressing, sprinkle with sesame seeds and dot with nasturtium flowers (if using). Serve immediately.

Cannellini bean and tahini soup with spiced chickpea croutons

From Easy Mediterranan By Sue Quinn (Murdoch Books) Photographer: Alan Benson

From Easy Mediterranan By Sue Quinn (Murdoch Books) Photographer: Alan Benson

Hearty and warming, with some spicy crunch from the chickpeas, this is a yummy and satisfying soup that everyone seems to love. The tahini adds a nutty creaminess, and just a hint of sesame.

Serves 4

for the soup

 2 tablespoons olive oil

1 small onion, chopped

1 carrot, chopped

1 celery stick, chopped

sea salt flakes

2 garlic cloves

1 teaspoon ras el hanout

750ml chicken or vegetable stock

500g cooked or canned cannellini beans (drained weight)

1 teaspoon chopped fresh thyme leaves

2 tablespoons tahini

lemon juice, to taste

freshly ground black pepper


for the spiced chickpeas

120g chickpeas (freshly cooked or canned), drained

2 tablespoons olive oil

½ teaspoon cayenne pepper

½ teaspoon smoked paprika

sea salt flakes

freshly ground black pepper

  1. First, get your soup going. Heat the oil in a pan, add the onion, carrot, celery and a pinch of salt, and fry gently over a medium heat, stirring frequently, until soft, about 8 minutes. Add the garlic and ras el hanout, and fry for a further 2 minutes. Pour in the stock, add the beans and thyme, then gently simmer for 10 minutes.

  2. While the soup is cooking, make your croutons. Using kitchen paper, dry the chickpeas and gently rub to remove the skins – be careful, as you don’t want them to squash. Heat the olive oil in a frying pan and fry over a medium heat for 10 minutes, or until crisp and golden – be careful, as they splatter a bit. Transfer to kitchen paper to soak up excess oil, then place in a bowl and toss with the spices, and salt and pepper. Set aside.

  3. When the soup is cooked, set aside to cool a little, then carefully ladle into a blender and blitz until smooth, or use a stick blender. (A food processor also works well, but your soup will retain a little texture from the bean skins.)

  4. Return the soup to the pan and warm through over a medium heat. Add a little lemon juice, stir, then taste seasoning, adding a little salt, pepper or more lemon juice if needed. Ladle into bowls and serve with the chickpea croutons on top.

Roast spatchcocked chicken with saffron, herbs and chicken-juice potatoes

Spatchcocked+chicken.jpg

 Serves 4

For the marinade

5 garlic cloves, crushed

1 teaspoon sea salt flakes

1 ½  tablespoon dried oregano

1 tablespoon fresh thyme leaves, plus a few extra sprigs

120ml extra-virgin olive oil

a generous pinch of saffron, chopped, or chilli flakes

finely grated zest and juice of  1 lemon

freshly ground black pepper

For the chicken and potatoes

1 free-range chicken

700g new potatoes

 1. Place all the marinade ingredients plus 2 tablespoons of warm water in a small bowl and stir to combine. Set aside.

2. Now, spatchcock the chicken. Place the bird breast-side down on a chopping board with the legs towards you. Using sharp kitchen scissors, cut along each sides of the parson’s nose, through the ribcage and to the other end of the bird. Remove the backbone and reserve for stock or freeze until you’re ready to use it. Turn the chicken over and press down with the heel of your hand to flatten.

3. Place the chicken in a non-metallic shallow bowl large enough for it to lay flat, pour over three-quarters of the marinade and massage in well all over.  With the bird skin-side down, cover and place in the fridge for at least an hour, ideally overnight.

4. Heat the oven to 200°C. If you want to roast the chicken over the potatoes (the spuds stay slightly crisper this way) have 2 oven racks ready: one for the tray of potatoes and another for the chicken.

5. Place the potatoes in a roasting tray large enough for them to sit in a single layer. Toss with the remaining marinade. Now, either place the chicken directly on top of the potatoes, skin-side up OR sit the chicken on the top rack skin-side up and the tray of potatoes on the rack underneath (be sure to place it directly under so as to catch all the juices).

6. Roast for 45 minutes - 1 hour or until the chicken juices run clear when you pierce the flesh between the thigh and the breast with a knife. Serve with the lemony pan juice spooned over and some garlicky mayo/aioli on the side, and some greens.

Cooling tomato, almond and mint soup

Recipe from Easy Mediterranean, Murdoch Books. Photograph Alan Benson

Recipe from Easy Mediterranean, Murdoch Books. Photograph Alan Benson

I am always amazed by the incredible flavour that results from whizzing these very simple ingredients together. I don’t think there’s any finer soup to sip on a hot summer’s day. 

Serves: 4

120g stale bread, torn into pieces (any kind is fine but sourdough is delicious)

4 tablespoons extra virgin olive oil, plus extra for drizzling

1.5kg ripe tomatoes, roughly chopped

2 garlic cloves, chopped

60g blanched almonds (whole or flaked)

1 teaspoon flaked sea salt , plus extra to taste

3 large mint leaves, or extra to taste, plus leaves to serve

Serrano ham, chopped boiled egg, to serve (optional)


  1. Place the bread in a bowl and pour over 1 tablespoon of the extra virgin olive oil. Set to one side.

  2. Now, place the tomatoes, garlic and almonds in a food processor or blender and blitz until the mixture is as smooth as you can get it. Tip into a sieve set over a bowl and push the solids with the back of a spoon to extract as much liquid as possible. Don’t forget to scrape the doen bottom of the sieve and add these bits to the bowl too. Discard the solids left in the sieve, and pour the liquid back into the blender.

  3. Add the soaked bread, the remaining 3 tablespoons extra virgin olive oil, the sea salt flakes and mint, and blitz until smooth. Add a little water if too thick. Taste and add more salt or mint to taste – there should just be a fresh back note of mint, so don’t overdo it. Chill well, ideally for a couple of hours if you have time.

  4. Serve topped with chopped mint and ham (chopped boiled eggs are also lovely) and a drizzle of extra virgin olive oil

Roast new potato salad with artichokes, asparagus, beans and pesto

Roast new potato salad with artichokes, asparagus, beans and pesto

How’s about this to go with your weekend BBQ? Roasted new potato salad with artichokes, peas and asparagus tossed with wild garlic pesto and a little bit of good mayo. We ate it last night with a side of BBQ salmon, and it’s got to be one of the best meals of Spring. The salad is adaptable, but do use new potatoes as they’re just so good at this time of the year. Substitute the vegetables with whatever you have. A dear friend gave me a bag of globe artichokes this week that worked brilliantly with the asparagus and peas (I used frozen but pop some fresh ones if you can find them). I’ve made versions of this before with green beans, and I mostly use salsa verde in the sauce. In various guises this is a regular on my table over the summer.

To serve 4 - 6 as a side

Ingredients

750g new potatoes

a good splash of olive oil

3 good tablespoons (or however much you want really) of salsa verde or pesto

1 dessertspoon good quality mayonnaise (optional)

3 good handfuls of lightly cooked spring vegetables such as asparagus (trimmed and cut in half), green beans (trimmed and cut in half), peas (fresh or frozen), globe artichoke

lemon juice

salt and pepper

fresh basil or mint (optional)

  1. Place the potatoes in a roasting tray and drizzle with olive oil. I used Pomora lemon oil, which is lovely, but standard olive oil is fine. Blast in a hot oven until burnished and tender, about 45 minutes at 180C.

  2. While the potatoes are doing their thing, lightly cook your vegetables in salted boiling water. Be particularly careful not to overcook asparagus - it is the deity of spring vegetables! - 7 minutes should do it, but check at the 5 minute mark. Drain well and et aside.

  3. As soon as the potatoes are done, leave them in the roasting tray and lightly crush with a potato masher - don’t turn them into mashed potato, you just want to open them up a bit to absorb the sauce. Add the salsa verde or pesto and gently toss to coat.

  4. Add the vegetables and the mayo (if using) and gently stir to combine. Add a scoop more sauce or mayo if you need more to coat all the vegetables generously.

  5. Season with salt and pepper and a spritz of lemon juice if you like. Serve warm or at room temperature, scattered with torn mint and basil if you have some available.

No-churn rhubarb and elderflower ice cream

Rhubarb and elderflower ice cream Copyright Sue Quinn

Rhubarb and elderflower ice cream Copyright Sue Quinn

Late Spring flavour combinations don’t come better than rhubarb, elderflower and strawberry. And this dessert looks like a painting, too, which I think makes it even more appealing. I made my own elderflower cordial which wasn’t overly sweet but if you use shop-bought, try diluting it a tiny bit. The aim here is to appreciate some of that sharp rhubarb tang not cover it up with sugar. The low water content of condensed milk is the secret to no-churn ice cream: it freezes smooth and creamy without ice crystals, so there’s no need to churn it as it freezes.

Ingredients

500g rhubarb, trimmed and cut into 3cm pieces, big chunks halved lengthways

150ml elderflower cordial

400g tin condensed milk

600ml double cream

Strawberries and elderflower cordial to serve

  1. Preheat the oven to 180C non-fan/160C fan//360F. Place the rhubarb in a roasting tray, pour over the elderflower cordial and spread out in a single layer. Roast for 15 minutes, or until the rhubarb is tender. Leave to cool.

  2. Blitz the rhubarb and all the tray juices to a puree in a blender or food processor. You can leave a handful of the rhubarb aside and roughly chop if you would like some bits of rhubarb in your ice cream. Chill the puree and rhubarb bits (if using) or pop into the freezer for 30 minutes to achieve this quickly.

  3. Whip the condensed milk and cream until thick enough to hold voluptuous peaks. Very gently fold the rhubarb into the condensed milk and cream mixture so as not to loose the air. Fold in the rhubarb bits if using.

  4. Scrape into a loaf tin, smooth the top and cover with cling film. Freeze for five or more hours until frozen.

  5. If serving with macerated strawberries, hull and halve the strawberries. Place in a bowl and pour over a splash of elderflower cordial. Set side for 10 minutes or so then serve with the ice cream.

Brown Butter Chocolate Chunk Cookies with Banana and Tahini

Image by Yuki Sugiura, from Cocoa: An exploration of Chocolate, with Recipes

Image by Yuki Sugiura, from Cocoa: An exploration of Chocolate, with Recipes

A great way of using up bananas that have over ripened and you might be thinking of chucking out. Don’t worry if haven’t any spelt flour - just increase plain flour to 240g. And you can make them without tahini or use smooth peanut butter as a substitute. 

150g / 5.oz unsalted butter
120g / 4.oz plain [all-purpose] flour
120g / 4.oz spelt flour
3/4 tsp baking powder
½ tsp bicarbonate of soda [baking soda]
½ tsp fine sea salt
280g / 10oz dark chocolate (70% cocoa solids), roughly chopped, with some biggish chunks and some small bits
1 very ripe banana, about 100g / 3.oz without skin
1 large egg
220g / 7.oz soft light brown sugar
40g / 1.oz granulated sugar
1 tsp vanilla extract
80g / 2.oz tahini (must be smooth and runny enough to run off a spoon easily)
flaked sea salt or fleur de sel, for sprinkling

Place the butter in a heavy, light-coloured pan and melt over a medium-high heat, swirling frequently, until the butter smells gorgeously nutty and has turned dark brown. 

Remove from the heat and transfer to a mixing bowl or the bowl of a stand mixer, making sure you scrape in all the brown bits from the bottom of the pan (this is flavour!). Leave to cool for at least 5 minutes.
Meanwhile, using a fork or balloon whisk, whisk the flours, baking powder, bicarbonate of soda and salt together in a bowl to combine. 

Add the chopped chocolate and stir to evenly distribute.

In a small bowl, mash the banana until smooth, then add to the cooled butter, along with the egg, both the sugars, vanilla and tahini. Whisk for a good 5 minutes until creamy and much paler than when you started –– this is a sign the mixture has aerated well.

Fold in the flour and chocolate mixture in 2 additions. Don’t overmix or beat smooth: dough with an uneven consistency delivers welcome texture to the baked cookies. Chill for at least 2 hours.

Preheat the oven to 170°C / 340°F / Gas mark 3 and line a large baking sheet with baking paper (you will need to cook these in batches). 

Scoop heaped tablespoons of dough onto the prepared baking sheet (about 40–45g / 1.–1.oz each), leaving at least 5cm / 2in between them. 

Bake for 6 minutes, then turn the baking sheet round and bake for a further 6 minutes or so until brown at the edges (the centre might look a little undercooked but it’s not).

Lightly sprinkle the cookies with the flaked salt while still warm. Leave on the baking sheet for 5 minutes, then transfer to a wire rack to cool.

Figs, books, memories and Kate Young's The Little Library Cookbook

kate young's book.jpg

Kate Young’s The Little Library Cookbook is a book I wish I had written.  Like Young, I’ve always had food and books on the brain, and her joyful collection of recipes and stories combines the two in way that takes me on a literary journey as well as a culinary one.

For a couple of years, Young has explored the connections between books, food and memory in her blog The Little Library Café and fortnightly columns in the Guardian. Now, it’s apposite and lovely that her literature-inspired recipes should come together in a gorgeous volume, a book to snuggle up with and leaf through, as well as cook from.

For me, the recipes trigger an avalanche of memories. Sticky marmalade roll from CS Lewis’ The Lion, the Witch and the Wardrobe, takes me back to reading the book to my children when they were very small – a time that now, in itself, seems a magical world away. There are crumpets from Daphne du Maurier’s Rebecca, a book I haven’t read for decades, but remains one of my favourites; the romance of Manderley on its windswept English coastline was one of many fictional magnets that first drew me to the UK from Australia.  Steak and onions from Graham Green’s The End of The Affair, is bittersweet, reminding me of how much I loved reading it when I was in my mid 20s, but at a particularly unhappy point in my own romantic timeline.

Young's recipe for Bread, Butter & Honey from Shirley Jackson’s We Have Always Lived In The Castle got me thinking about the food that appears in my own favourite books. I didn’t read Jackson’s classic until relatively recently, when I realised I had missed out many quintessentially English novels. I spent my teenage years immersed in Australian fiction, books like Picnic At Hanging Rock, Seven Little Australians (oh Judy, my lip still trembles for you!), My Brother Jack, The Harp In The South, I Can Jump Puddles, The Chant of Jimmy Blacksmith, The Getting of Wisdom and The Thorn Birds (pilfered from my mother’s bookshelf, I mainly read it for the sexy bits).

The book that resonated most in my 13-year-old head and heart was Miles Franklin’s My Brilliant Career, the tale of rebellious misfit Sybylla, who yearned for a life beyond the confines of outback NSW, and shunned romance to be a writer. I related to her in so many ways it was painful. Food in literature wasn't a major draw for me then, but I do remember clearly Sybylla nibbling on apricots and figs as she endlessly read and wrote. (I didn’t appreciate it at the time, but Franklin was associating reading as nourishment of the soul as well literal nourishment through food, a point made in Susan K. Martin’s essay on the book).

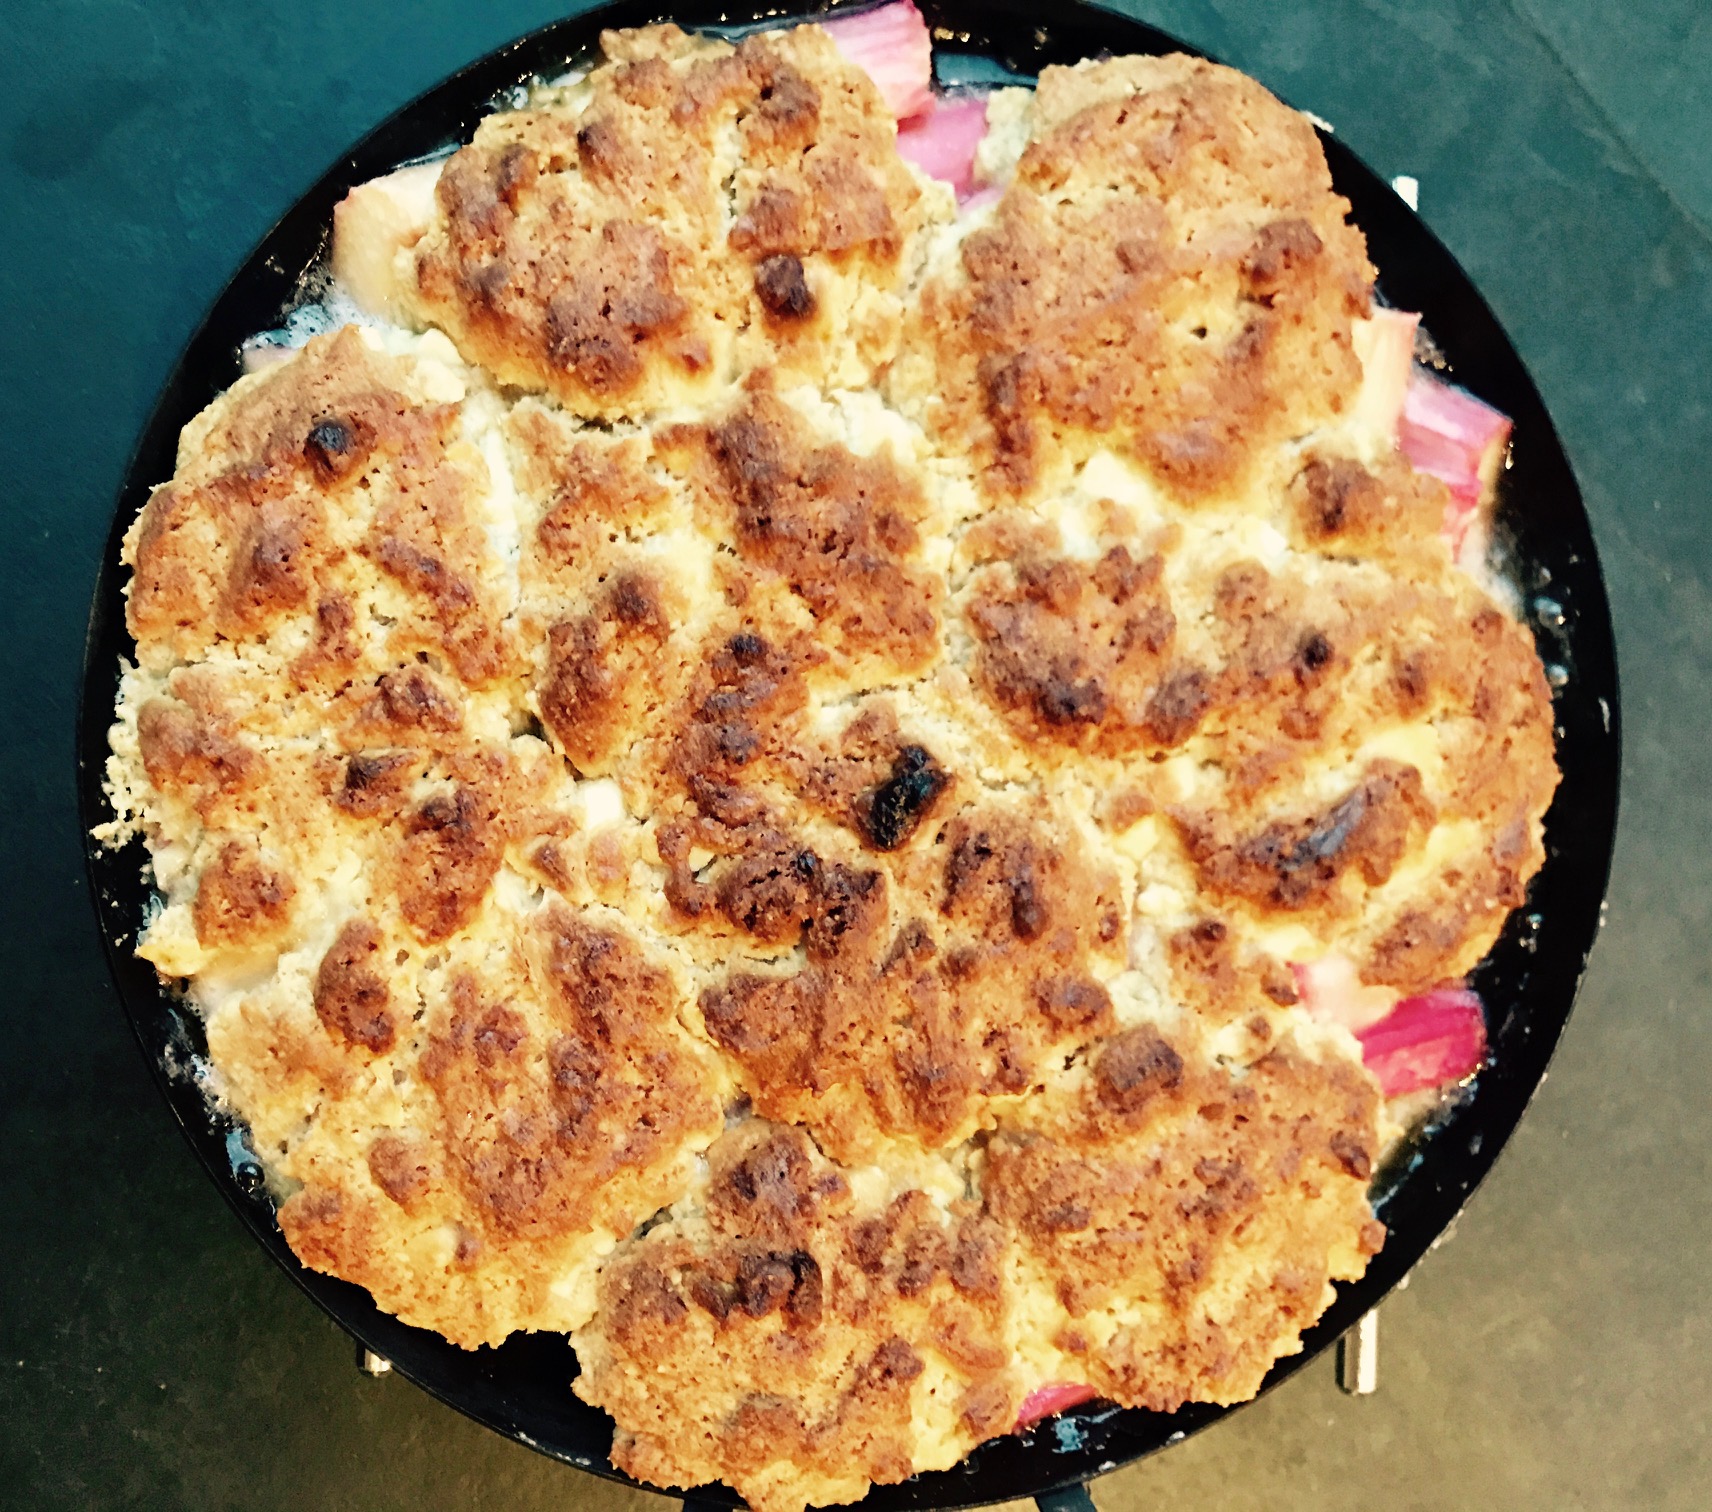
Sybylla ate her fruit freshly plucked from trees in the garden of Caddagat, the genteel property on which she stays and where she falls in love with wealthy landowner Harold Beecham. I like to think that maybe, in times of glut, she might have eaten this figgy bread and butter pudding. It's adapted from my new book Roasting Tray Magic, simply substituting figs for the strawberries and rhubarb.

small pudding.jpg

Figgy bread and butter pudding

Serves: 6-8 | Takes: 1 hour 20 minutes

3 tablespoons unsalted butter, plus extra for greasing

2 tablespoons runny honey

10 ripe figs, quartered

50g caster sugar

4 large eggs

400ml double cream

400ml milk

1 vanilla pod, split in half lengthways, seeds scraped out

grated zest of 1 orange

1 large brioche loaf, cut

Method

Preheat the oven to 170C//325F and lightly butter a 30 x 20 x 5-cm roasting tray or dish.

Heat the 2 tablespoons butter and the honey in a large frying pan and when foaming add the figs cut-side down. Fry for a couple of minutes until golden, then turn and cook the other cut side. Transfer the figs and their sticky buttery juice to the roasting tray, spreading them out evenly.

Mix the eggs, cream, milk, the remaining sugar, the vanilla seeds and orange zest together in a jug.

Working one slice at a time, dip the brioche into the cream mixture until thoroughly soaked and arrange on top of the fruit, slightly overlapping. Pour any of the remaining mixture over the top, and set aside for 15 minutes while the bread soaks.

Bake for 40–45 minutes, or until puffed and golden.


Market to Table with Rachel Roddy - and Carla's focaccia

"Always add the rosemary to the top of the focaccia after it has baked," says Carla Tomasi " or the essential oils will turn bitter in the heat of the oven." Tomasi - chef, baker, cookery teacher and erstwhile London restaurateur - proves the point that Italy's wondrously salty, olive-oil drenched flatbread is theoretically easy to make, but true deliciousness lies in the detail.

I'm in the light-drenched Latteria Studio in the Trastevere district of Rome, for the Market to Table event run today by Carla and food writer Rachel Roddy. It's not a cooking lesson as such, more a celebration of Roman cuisine and a chance for visitors to this glorious city to learn about its food, cook together and share a wonderful meal.

The day starts at the Testaccio Market; I've never been here before but I feel I know it well through Rachel's writing. This is her much-loved local market, almost a vibrant, bold character in its own right in her award-winning cook book Five Quarters. We fill our bags with produce, swoon over towers of sculptural artichokes and discuss the best way to cook chickpeas with a shopkeeper (a pinch of bicarb and much soaking).

peas.jpg
artichokes.jpg

Then we walk back across the river to Trastevere, past the Monte Testaccio hill, composed of 53 million broken amphorae, the terracotta vessels used in antiquity to hold grains and other foods, that were broken up and disposed of in this enormous dumpsite. On we go, winding our way through Testaccio's disused abattoir, once the largest in Europe, which gave rise to the district's tradition for offal-based dishes like trippa alla romana and oxtail stew. Across the Fiume Tever or the River Tiber, and we arrive at the beautiful little studio run by food stylist Alice Adams, where Carla has made us cinnamon rolls and coffee, and made a head start on the focaccia dough.

For me, the joy of the day lies as much in the cooking, prepping and discussing food communally, as it does in the learning: too many hours, I suppose, alone in the kitchen testing recipes with zip for company but Radio 4. And as Rachel says, many hands make otherwise onerous kitchen tasks easy. I would rarely contemplate making Alici impanate e fritter (fried anchovies) at home - the gutting, deboning and preparing the tiny silver fish, the most adored on the Roman table, just seems too much for one cook. And so it goes. Making fresh pasta seems fluid and simple with many shoulders to the wheel, while prepping vegetables - including a mountain of violet streaked artichokes - and other bites, seems not to much a job as a pleasant task with a soothing rhythm.

Not only have I learned the best way to bake focaccia, make pasta and prepare anchovies and artichokes - but rediscovered that many hands make light and joyful work in the kitchen. Let there be more communal cooking in my life.

For information about Market To Table days visit Latteria Studio or keep an eye on Rachel's blog or Instagram feed @rachelaliceroddy, or Carla's Instagram feed @tomasi_carla. 

Carla's Focaccia e focaccine

There are endless recipes for focaccia out there in the wild, so mine is not the definitive article, but this makes me happy and ticks all the right boxes. Light/airy/bouncy/soft crumb/keeps and freezes well. So here it is.

Oven temp.  190c. For a focaccia not too thick, bake it in tin 34 cm across. Quantities can be easily halved or bake in two smaller tins. One for now and one for later.

200 gr plain flour

200 gr strong bread flour

1 teaspoon of fast action dry yeast

1 teaspoon of fine salt

1 tablespoon extra virgin olive oil

300 gr of tepid water Note: Measure the full amount but never add it all at once because the variants of the ability of flour to absorb liquid are many. Dry or wet flour/cold or hot day/ controlled environment or open windows and so forth..

Method

Place flours, yeast and salt in a suitable mixing bowl and swirl around. Drizzle in the olive oil and then pour in the water. Maybe on a very cold day the water temperature ought to be on the warm side of tepid and never mix your dough in a metal bowl. The dough will chill and stop working (just like you when you get a cold). Plunge one hand in and use it as if it is the (kenwood) K beater. As you go around the bowl, gather flour from the side towards the center. Once all the flour has been incorporated, pat into a shaggy mass, cover with a cloth and leave to rest for at least 15 minutes. Do not worry if the dough feels sticky, it will be fine.

When resting time is over the dough will feel soft and pliable. Pour a little olive oil on the work surface and plop the dough on it. Flatten it out gently and then pull the dough from the edge towards the center and every time give it a quarter turn. Pull the dough four times. Upturn the mixing bowl over the dough and again leave to rest for about 15 minutes. Repeat this process twice more. Now gather the dough into a ball and leave to prove ( around45 minutes) in an oiled plastic bowl. When the dough is ready ease it gently out of the bowl and onto an oiled baking tray.  Leave to rest until the dough has relaxed( approx.15 mins) Try to finger massage the dough into shape and if it feels like springing back leave to rest for a while longer.

Once the dough has been spread out leave to rise ( preferably uncovered) well away from droughts or direct heat. If the day is really hot you may need to cover it.  Could take from 40 mins to 1 hour. If a thin skin forms on the surface of the dough it is fine, it will be easier to brush it with olive oil.

When well puffed up- you know what I mean-gently dimple the surface with your fingers and brush lightly with oil. Pop into the very hot oven and rotate the tin at lest once. Takes around 20/ 25 minutes to bake but much depends on your oven.

I would strongly advise against baking the focaccia with any herb strewn on the surface, especially rosemary because the essential oil within the herb will turn bitter due to the strong heat. For a real taste sensation chop some rosemary needles finely and shower the focaccia as soon as it is out of the oven. Boom! Focaccia freezes really well( so make two)and wedges can be reheated in the toaster quickly because of the porous crumb structure.

I often like to make focaccine with various toppings and they are very easy to prepare. The above quantity of dough will be enough for 4 focaccine of 20-22 cm diameter or you could make them thinner if you wish. After the first rise split the dough in four and gather into balls. While the dough relaxes prepare the toppings. Finely slice one red onion and place in a little bowl with olive oil and thyme. Very thinly slice a small potato and toss with olive oil. Mix a couple of tablespoons of grated cheese, like parmigiano or grana, with quite few grindings of black pepper. Very finely chop some rosemary and set aside. When the dough is soft and pliable again roll it or pat it out into rounds. Place them on an oiled surface- like an oven tray or individual small tins and leave to rise till nicely puffed up and then place the toppings on. May need a drizzle of oil and some salt sprinkled on. They usually bake in around 10/12 minutes.


Rhubarb and white chocolate cobbler

Doris tore around my garden last week, hell-bent on spoiling the first fragile signs of spring: she flattened the daffodils with her ferocious breath just as the buds were beginning to unfurl, and stamped on the purple crocuses that had popped up outside the window next to my desk. Thankfully, along with this howling harridan of a storm, nature also delivered rhubarb.

I'm growing this tantalising vegetable in the garden border - the crimson stalks look promising but they’re not quite ready to pick yet. Until they are, forced rhubarb will tide us over, the stuff magically 'forced' to grow in darkened sheds and under terracotta pots that has just appeared in greengrocers. For food lovers, this really is a glorious time - rhubarb brings a splash of colour to the dreary February kitchen, as well as mouthfuls of zing and vibrant flavour to palates jaded by endless brassicas.

It's a perfect ingredient for a time of year when the weather is erratic. Its cheery colour and tang works beautifully in upside down cakes, frangipane tarts, jams and comforting winter puddings like the one below. But it's also equally delicious in lighter, fresher food. For example, I have some golden beets in the crisper drawer as well as some spare rhubarb stalks, so I’m going to turn them into Yotam Ottolenghi’s vivid beetroot and rhubarb salad this week. I also love to pickle rhubarb – it's gorgeous as a mouth puckering side to oily fish like sardines (there's a recipe for grilled and soused sardines on toast with pickled rhubarb salad, pictured below, in my latest book, easy Easy Mediterranean).  

I try to keep bowls of roast rhubarb in the fridge throughout the season for quick snacks and easy puddings. Unless you're making jam, don't boil rhubarb; its glorious colour turns to sludge and the flesh is easily reduced to mush. Roasting is best and the following method works for me: just toss chunks of rhubarb with caster sugar (20g of sugar per 100g rhubarb), place in a single layer in a roasting tray and roast for 15 minutes at 200°C, or until tender but still retaining its shape and colour. You can add a squeeze of citrus juice  to the tray before cooking - lemon or blood orange is lovely - or maybe a cinnamon stick or some star anise. There's probably no more gorgeous breakfast in the summer than a bowl of chilled roast rhubarb served with a splodge of full-fat Greek yoghurt or labneh, and a handful of almonds or pistachios.

If you're still hankering after something decadent and comforting - and honestly, who isn't in this weather? -  this pudding is the business. The tangy, acidic sharpness of rhubarb works a treat with the rich creamy notes of white chocolate, in the same way that rhubarb and custard is such a perfect pairing.

Rhubarb and white chocolate cobbler

For the cobbler topping

150g white chocolate

120g plain flour

20g rye flour

40g ground almonds

60g soft light brown sugar

1 teaspoon baking powder

1/2 teaspoon bicarbonate of soda

1/4 teaspoon salt

100g cold butter

150g Greek yoghurt

For the rhubarb

Butter for greasing

1kg trimmed rhubarb, chopped into 4cm pieces, and in half if very thick

300g caster sugar

60g plain flour

Method

1. Start by popping the white chocolate into the freezer, ideally an hour or so ahead of cooking. This will help the chocolate retain a little shape while it's in the oven and give you lovely chocolate bursts in the finished pudding. Preheat the oven to 180°C and butter a 20cm round baking dish

2. Toss the rhubarb with the sugar and flour and tip into the prepared baking dish. It might seem like a lot of flour but stay with it.

3. Now make the cobbler topping. In a mixing bowl, whisk together all the dry ingredients. Grate the butter into the bowl and rub it in with your fingertips to produce what looks like rough breadcrumbs. 

4. Chop the chocolate into pieces about the size of your small fingernail and add to the dry ingredients. Stir in the yoghurt to make a stiff dough - try not to overmix.

5. Place blobs of the dough on top of the rhubarb and flatten slightly so the top is almost but not completely covered. Bake for 30-35 minutes, or until the top is golden and you can see juices bubbling slightly at the edges. Serve with vanilla icing or gently whipped cream.


Roast turbot with bay and blood orange hollandaise

Once upon a time, even the thought of making hollandaise made me a bit afraid. This classic, sublimely buttery sauce – soul mate of asparagus, eggs, new potatoes, green vegetables, fish … actually, anything you can reasonably pour thick silken ribbons of the stuff onto … is notoriously easy to botch. Too much heat and the emulsion of egg yolks and butter will separate, leaving you with a heartbreaking curdled mess rather than creamy, glossy deliciousness.

Hollandaise takes some skill and practice, for sure; god knows I only got the knack after countless failed attempts. But what I’ve come to learn is that, like so many dishes, hollandaise can detect the faintest whiff of fear, filthy bad mood or stress. Attempt to make it with one of these humours lurking in the kitchen,  and chances are that some of your anxiety or waspishness will spill over into the mix and ruin it.

Nigerian food writer Yemisi Aribisala puts her finger on it in her wonderful book, Longthroat Memoirs: Soups, Sex and Nigerian Taste Buds. “That which you cook is informed by everything about you: your mood, spirit, environment, temperament,” she says. She’s so right.  Further,  I've found that some dishes are more willing than others to turn a blind eye to your panic or bad mood. Stew, for example, doesn’t seem to mind a bit whether you hum cheerfully as you chop or peevishly throw everything into the pot. But in my kitchen at least, sauces, bread, pastry and fish are more sensitive culinary creatures, more likely to behave well if I approach them with my chest puffed out with confidence and a spring in my step.

I recently made this dish after a long day walking and exploring the coastal paths near Lulworth Cove, a glorious horse shoe bay a little way east along the Dorset coast from my home. It was bitingly cold but the sun was shining on a glorious landscape, I didn’t fight with the children for the whole entire day and the dog did not raid anybody’s picnic and steal their sandwiches. I bought the turbot from the lovely lady at Cove Fish, whose son and husband (eleventh and twelfth generation fishermen, no word of a lie) caught the little beauty in the bay the day before. In summary: there was no chance my hollandaise was going to go wrong.

If you too are little bit afraid of making hollandaise, turn on the radio,  pour yourself a glass of wine and politely wave the children off to play on their screens. Whatever you do, do not multitask, rather immerse yourself in the process, stirring constantly and cooking it slowly. If it all goes wrong (which it probably will if you’ve never made it before) just cheerfully start again. 

Roast turbot with bay + blood orange hollandaise

Turbot is rightly known as The King of Fish – it’s absolutely delicious but can be royally expensive. Choose another whole fish if you like, but the cooking time will probably vary from this.  To check your fish for doneness, push a knife into the thickest part of the fish near the backbone; gently prise it up so you can check the flesh – if it’s opaque it’s done, if it’s still translucent, it needs a little more time. The hollandaise here is flavoured with orange unlike the standard version season with lemon juice.

Serves 4

  • A little olive oil for oiling
  • 1 turbot, about 1.5kg, gutted
  • A handful of fresh bay leaves or a small handful of dried ones
  • A good few tablespoons of unsalted butter
  • Sea salt 
  • Freshly ground black pepper

For the hollandaise (based on a recipe from Leith’s Cookery Bible)

  • 3 egg yolks
  • A pinch of sea salt
  • 100ml white wine vinegar
  • 10 black peppercorns
  • 2 bay leaves
  • 170g butter, cut into small cubes
  • Finely grated zest ¼ blood orange (any other sweet orange is fine)
  • 1 tablespoon blood orange juice (any other sweet orange is fine)
  • Lemon juice, to taste (optional)
  1. Preheat the oven to 220°C and lightly oil a roasting tray large enough to hold the turbot.  
  2. Season the cavity with salt and pepper and stuff with the bay leaves. Season well and place in the roasting tray dark-side up.  Generously smear  with butter and roast for 20 minutes, basting halfway through. Check to see if it’s done – if not return to the oven a little longer.
  3. Meanwhile, make the hollandaise. Put the vinegar, peppercorns and bay leaves in a small pan and simmer very gently until reduced to about one generous tablespoonful. Set aside to cool.
  4. Find a medium pan for which you have a heatproof bowl that sits nicely on top without touching the bottom. Fill the pan with a few centimetres of water and bring to a gentle simmer. 
  5. While this is happening, place the egg yolks in the heatproof bowl and whisk with a pinch of salt until creamy. Strains the cooled reduced vinegar into the eggs, and discard the peppercorns and bay leaves. Stir in the orange juice and zest.
  6. Set the bowl with the eggs over the simmering water and whisk in the butter cube by cube, making sure each one has melted and amalgamated into the sauce before adding the next. After you have added about half the butter, you can start to add it in larger quantities.
  7. When the butter is all used up, whisk continuously until the sauce is thick and falls off the the thick in ribbons that leave a trail. Pull the pan off the heat at once if you see steam coming from the pan. Taste for seasoning and add salt and lemon juice if you like. 
  8. Set aside in a warm place until you area ready to serve the fish – hollandaise doesn’t cope with reheating.  This dish is fantastic served with buttery kale and crushed new potatoes.


Spicy bean stew with mozzarella puddles

beans and mozzarella

Do you soak dried beans for 12 hours before you cook them? Or do you reach for the canned stuff because a) you cant be bothered  b) you don’t plan your meals that far ahead? c) you meant to but forgot?

Take heart. A slew of recent cookery articles has confirmed what some people have believed for years – beans don’t really need to be soaked before cooking.  Melissa Clark in the New York Times is one such Non Soaker. In a recent article she exhorted readers to ditch canned beans for dried because dried are so easy to cook from scratch: just simmer in salted water until tender without soaking first, she suggests. The keen beans at Epicurious quickly jumped on the no-soak bandwagon too.

As a Soaker I was intrigued – the conventional wisdom, echoed by many fine food writers, is that soaking beans slashes the cooking time and softens the skins. But after a little experimentation myself, involving several pans of butter beans and different cooking methods, I’m pretty much converted. By all means, soak beans if you have the time or inclination, or cheat-soak by bringing your beans to the boil, turning off the heat and leaving them to sit in their water for an hour. But really, soaking them first will save you barely any cooking time at all.

Another thing my experiment confirmed is that salting the water in which you cook the beans does not make them tough, just tastier; tossing in an onion and some bay leaves makes them even more flavourful. And this is where beans cooked from scratch have the edge over canned. Melissa Clarke describes canned beans are “a wan simulacrum, fine in a pinch but never transcendent.” While I love her description, I don’t agree – good quality tinned or canned beans can be perfectly lovely. But there is something wonderfully calming about cooking a pan of dried  beans; the starchy broth it produces is delicious added to soups and bean dishes (as Rachel Roddy explains so well in her wonderful cookbook Five Quarters). Plus, the beans you cook yourself are definitely creamier than canned.

I generally cook whole packets of beans at a time these days, rather than leave oddments in the larder, and either keep the cooking pan (with the beans and liquid) in the fridge for cooking meals throughout the week (as per Roddy’s suggestion). Or else I freeze what I’m not using immediately, for reheating in fresh water later. This is handy because if you have beans to hand you have a meal.

Beans slurp up flavours, so I cook them all sorts of ways. I often blitz them into a creamy puree in the blender, adding some of the bean cooking water to loosen, then maybe some herbs and spices, yoghurt or olive oil, a garlic clove or maybe even a little saffron crushed in hot water. To make soup, stir in lots of hot stock, or leave it thick and creamy to serve in lieu of mashed potatoes with meat (lamb chops!) or for dunking vegetables.

Beans are also fantastic in the soup pot – with or without a bacon bone – and lots of lovely vegetables, or used to bulk out stews if you’re trying to cut down on meat. I’m rather fond of the recipe below – it’s a bean stew in its own right, although the addition of bacon and/or chorizo really elevates it into something wonderful. 

Spicy bean stew with mozzarella puddles

You can easily make this a vegetarian version just by leaving out the pancetta or chorizo

  • Olive oil
  • 200g pancetta or cooking chorizo
  • 1 onion, finely chopped
  • 2 garlic cloves, finely chopped
  • 2 tins tomatoes, chopped
  • 1 red pepper, chopped
  • 1 tablespoon chipotle paste
  • ¾ tbsp dried oregano
  • 600g cooked white beans + 1 cup of cooking liquid
  • 120g mozzarella or labneh balls (or 2cm cubes)
  • salt and pepper

Warm a good splash of olive oil in an ovenproof frying pan and add the pancetta or chorizo. Cook, stirring often, until the pancetta is crispy at the edges and starting to turn golden. Remove from the pan with a slotted spoon and put to one side. Add the onion and a pinch of salt to the pan and cook very gently for 10 minutes, until very soft and golden. Add the red pepper and garlic and cook for a couple of minutes more. Stir in the pancetta and chipotle paste so it’s combined with all the ingredients and lovely and aromatic. Add the tomatoes and oregano, squash any big bits with a wooden spoon, and season well with salt and pepper. Add 250ml of the bean cooking liquid (or water if you don’t have any) and simmer for 10 minutes or until thickened slightly. While this is happening, preheat the grill to high. Add the beans to the tomato mixture and simmer for 5 minutes more, until warmed through. Dot the top of the mixture with mozzarella or labneh all and set under the grill for 5 minutes, or until melted into creamy puddles.

Chamomile & honey olive oil cake

I drink bucketfuls of chamomile tea each day and olive oil cakes are my favourite treat, so this is my idea of a perfect afternoon tea. Use chamomile flowers if you can. They’re widely available these days and their flavour is intense, almost tangy, but tea bags also work nicely. I normally love the flavour of olive oil in cakes, but I’ve suggested using a mild version in this one so the chamomile can shine through.

Makes a 20 cm (8 inch) cake

  • 125 ml (4 fl oz/½ cup) milk, plus extra if needed
  • 3 tablespoons chamomile flowers or 4 chamomile tea bags
  • 250 g (9 oz/1²⁄₃ cups) self-raising flour
  • 150 g (5½ oz/²⁄₃ cup) caster (superfine) sugar
  • 1 teaspoon baking powder
  • a generous pinch of salt
  • 250 ml (9 fl oz/1 cup) mild olive oil
  • 70 g (2½ oz) honey
  • 3 eggs

For the lemon icing

  • 150 g (5½ oz) icing (confectioners’) sugar, sifted
  • finely grated zest and juice of 1 lemon
  • a splash of milk
  1. Preheat the oven to 160°C (315°F).
  2. Oil a 20 cm (8 inch) round cake tin and line the base with baking paper.
  3. Pour the milk into a small saucepan and gently warm through without letting it reach the boil, then remove from the heat and add the chamomile flowers or tea bags. Set to one side for a good 10 minutes so the milk and chamomile can infuse and cool.
  4. Now, whisk together the flour, sugar, baking powder and salt in a large bowl. In a separate bowl, whisk together the olive oil, honey and eggs.
  5. Strain the chamomile flowers from the cooled milk, or remove the tea bags, and measure how much milk you have – you need 125 ml (4 fl oz/½ cup), so add more milk if necessary.
  6. Stir the infused milk into the oil mixture. Pour this mixture into the flour mixture, mixing until well combined and lump-free, but don’t overbeat it.
  7. Pour the batter into the tin and bake for 40–50 minutes or until the cake is golden and a skewer comes out almost clean. Leave the cake in the tin for 5 minutes, then turn out onto a wire rack to cool.
  8. While the cake is cooking, stir together the lemon icing ingredients, keeping some of the lemon zest for the top of the cake and adding just enough milk to give it a loose pouring consistency.
  9. When the cake is completely cold, drizzle with the lemon icing and sprinkle with the reserved lemon zest.

Spaghetti with red chicory, bacon and garlic crumbs

Salty, crunchy, bitter and savoury: a glorious combination in a quick and easy pasta dish.

Serves 4

  • 400 g (14 oz) spaghetti

  • 1 tablespoon olive oil, plus extra for cooking

  • 2 thick rashers smoked bacon, cut into matchsticks

  • 250 g (9 oz) red chicory (endive or witlof), thinly sliced with a few of the end parts of the red leaves torn

  • 2 tablespoons dry white wine

  • finely grated zest of 1 lemon

  • 1 small handful flat-leaf parsley leaves

For the garlic crumbs

  • 1 tablespoon olive oil

  • 30 g (1 oz) good-quality fresh breadcrumbs, ideally made from sourdough or Olive oil bread

  • pinch of sea salt flakes

  • 2 garlic cloves, crushed

  • finely grated zest of 1 lemon

  1. Get the water for your pasta on the go – don’t add too much salt as salty bacon is in play here.

  2. While it’s coming to the boil, make the garlic crumbs. Heat the olive oil in a large frying pan, add the breadcrumbs and a pinch of sea salt, and stir-fry over high heat until the breadcrumbs just start to smell toasty, about 3 minutes.

  3. Add the garlic and cook, stirring to stop it burning, for a couple of minutes more.

  4. Pull the frying pan off the heat and stir in the grated lemon zest, then spread the breadcrumbs out on a plate so they stay crisp.

  5. Wipe out the pan.

  6. Add the pasta to the boiling water, then heat the olive oil in the frying pan. Add the bacon and fry over medium heat until starting to turn golden.

  7. Add the sliced witlof and fry for a few minutes more, stirring often, until it is just softened.

  8. Pour in the wine.

  9. While it’s bubbling up, scrape the bottom of the pan with a wooden spoon to loosen any delicious caramelised bits.

  10. Pull the pan off the heat.

  11. When the pasta is cooked, drain it, keeping a little of the cooking liquid.

  12. Tip the pasta into the frying pan, return to low heat and add a splash of the olive oil and a splash of the cooking liquid.

  13. Gently toss to combine and warm the pasta through, adding more oil or liquid if the pasta is dry.

  14. Add the lemon zest, parsley, torn witlof and half the garlic crumbs to the frying pan, then gently toss.

  15. Serve immediately, with the remaining garlic crumbs sprinkled over the top.