
How to make buttermilk
Shirley Conran famously said that life was too short to stuff a mushroom. I’ve never agreed with her. Stuff a mushroom, make a Christmas pudding, brew your own beer. If it satisfies a creative itch, go for it I say. That’s why I end up making things like buttermilk.
Recipes containing buttermilk often suggest making a simple substitute by splashing lemon juice or vinegar into milk, then leaving it to sit and curdle. This method works perfectly well, but until recently I didn’t appreciate the extent to which it really is just a stand-in. Real buttermilk - and I’m not talking about the stuff from the supermarket - is so much better and very easy to make.
Why use buttermilk? Because it’s fermented, buttermilk is a wonderful ingredient to use in baking. The lactic acid it contains makes tender cakes and pastry because it softens the gluten in flour (check out this beautiful buttermilk frangipane cake). It makes lighter biscuits and fluffier pancakes because the acid boosts the action of raising agents, and produces deliciously thick dressings due to its curdling properties. It’s also hugely popular to make tender fried chicken. In its most basic form, buttermilk is the liquid left over after churning cream from butter.
Back in the day, milk would sit in the dairy to allow time for the milk and cream to separate. In the process, naturally occurring lactic acid-producing bacteria had time to ferment the milk. These days, health and safety has something to say about letting milk sit around to turn sour, so most commercially produced buttermilk is inoculated with cultures that mimic the traditional process. It works well, but lacks the rich, intense flavour of traditionally made buttermilk. If you like a food project, this one is very satisfying and brilliant to involve the kids in as some wonderful transformations take place. The best part is that in the process you get buttermilk and wonderful butter.
For the buttermilk
You will need 250ml of the best double cream you can find and 50ml active natural yoghurt.
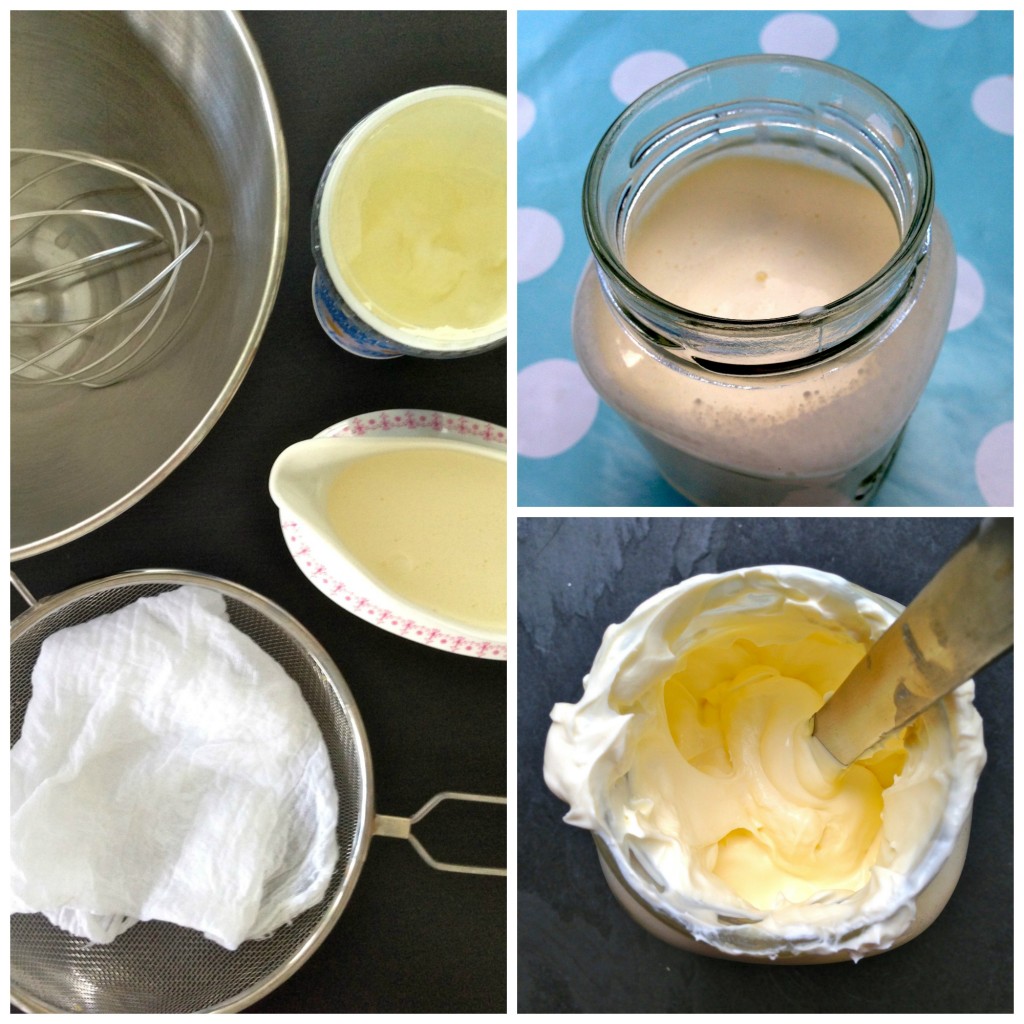
Place the cream and yoghurt in a jar, stir well, cover with a clean cloth and set aside on your kitchen bench until it thickens and sours. This can take up to 48 hours but mine took about 30 hours. When done, the cream should be very thick and creamy and taste sour - a bit like thick crème fraiche.
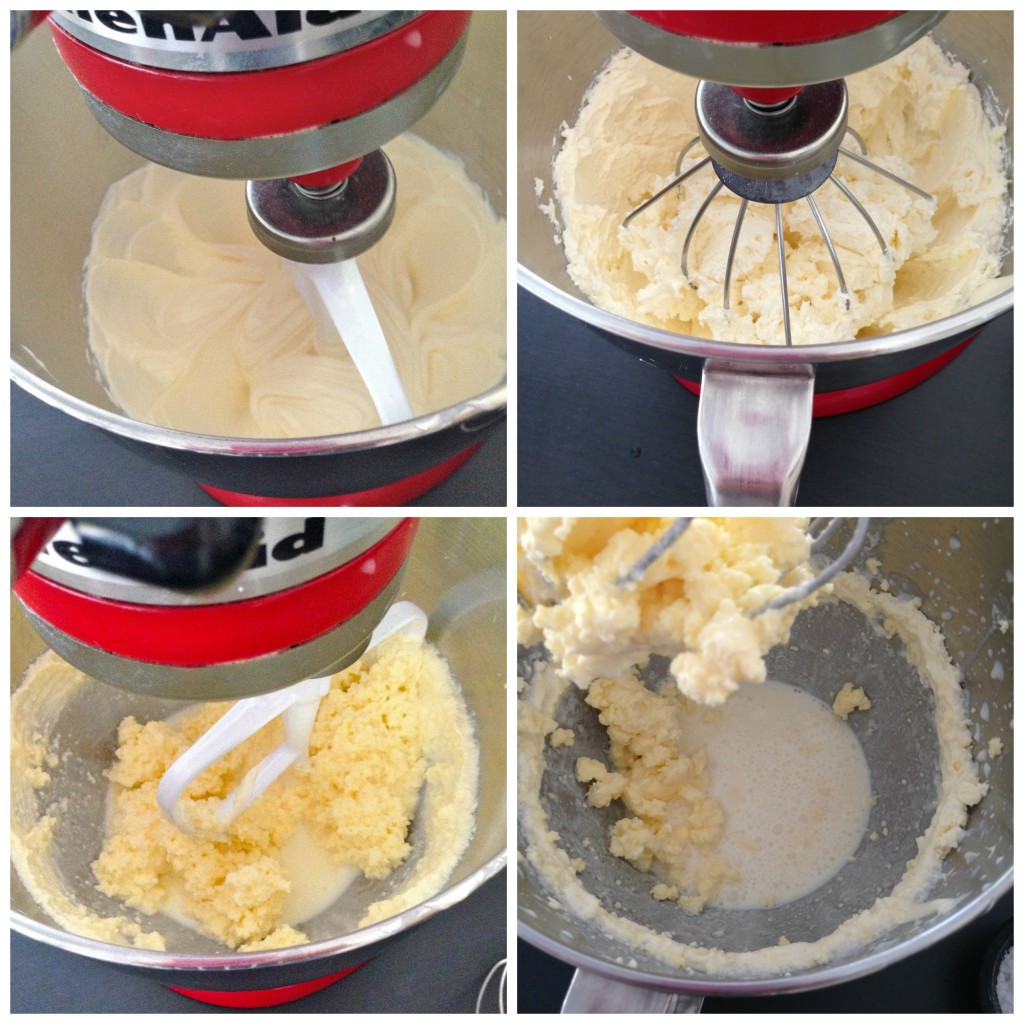 Transfer to a mixing bowl and beat on medium speed (I tried the paddle attachment and the whisk and both work well). The cream will turn thick, then lumpy and eventually separate into solids and liquids: butter and buttermilk. Line a sieve with a piece of muslin or nut bag, set it over a bowl and tip in the butter and buttermilk. Gather the muslin together and squeeze out any extra buttermilk, then return the butter to the bowl. Cover it with cold water then massage and knead the butter, dunking it into the water to remove as much buttermilk as possible. Change the water and repeat. (This technique is adapted from Darina Allen’s method.)
 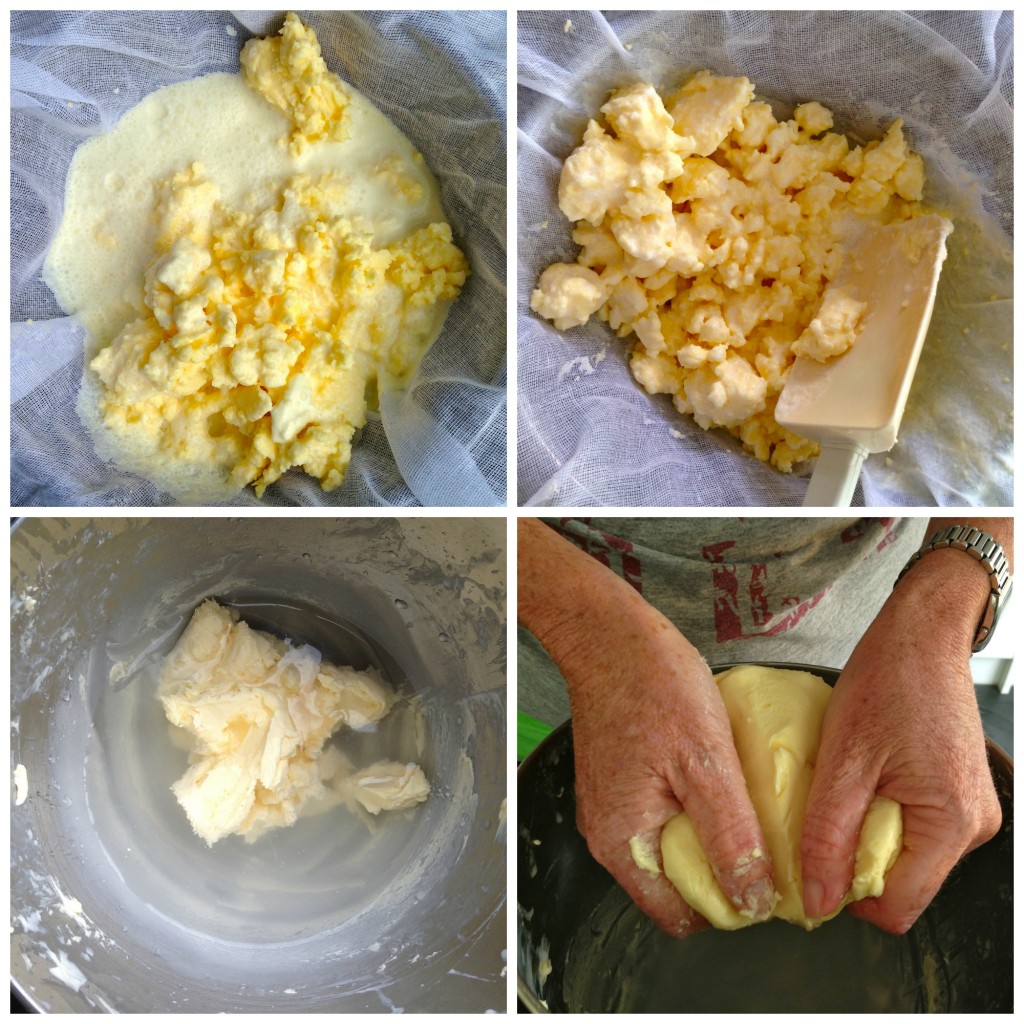 You should end up with 200g of butter (just pat it into shape with your hands or use butter paddles if you happen to have some lying around) and 150ml buttermilk. Ta da! Wrap the butter in greasproof paper and store in the fridge. I don’t add salt, but there’s nothing is to stop you spreading it thickly on lovely bread and sprinkling it the Fleur de Sel or the like.
 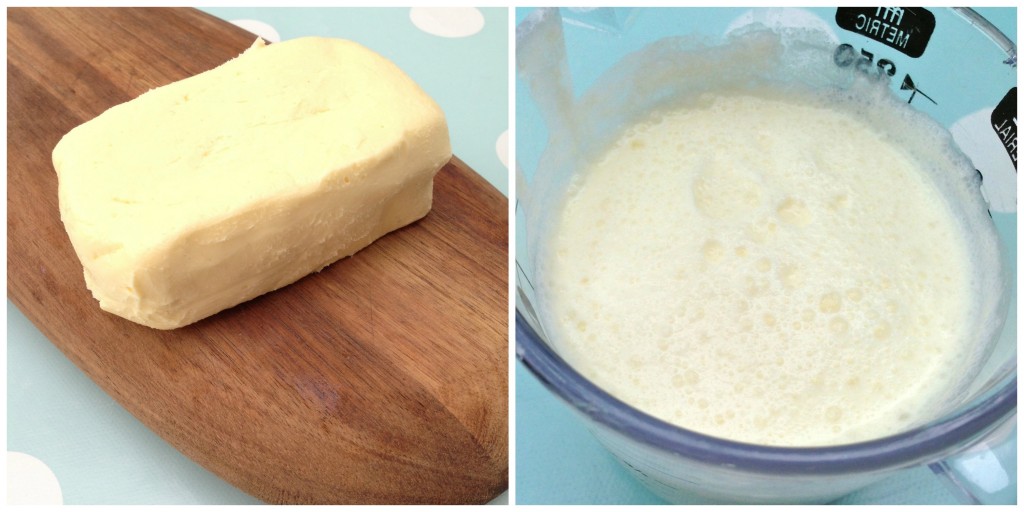 If you want your domestic angel halo to shine especially brightly, try this recipe for a divine white chocolate and raspberry tart that uses both the buttermilk and the butter in the pastry. Is life too short to make buttermilk? Let me know what you think.